I will summarise the entire process of getting a driving licence in Bangalore. Without Broker / agent or any driving school. Before starting, here is the checklist:
- No matter wherever you are in Bangalore, choose KR Puram RTO (https://goo.gl/maps/fKCEV) for getting your driving licence. Personnel there are a thousand times more civilised and honest than others. I visited Koramangala RTO first, which is ruined by agents and corrupt officials.
- You’ll first need to apply for learning driving licence. After one month, you can apply for permanent driving licence.
- You would need an age proof and address proof, along with corresponding originals documents.
- Common age proofs– 10th class marksheet or PAN card.
- Address Proof is complicated. If you are an outsider, staying in a rented apartment, then you would compulsorily need 2 address proofs, both for your local address as well as your permanent address.
- Local address proof– A rental agreement carrying your name as “tenant” and your landlord’s name as “owner”, along with electricity bill in your owner’s name will suffice. Visit Kormangala’s BDA complex (https://goo.gl/maps/aeunM) to get your rental agreement for about Rs 170/-
- Permanent Address proof– Your Voter card or Passport mentioning your permanent address would suffice. If you are a localite, i.e, your permanent address is same as local address, then only permanent address alone will suffice. Check this page for comprehensive list on address and age proofs – https://sarathi.nic.in:8443/nrportal/sarathi/redirect.jsp?id=howtoll
- You would need a few passport sized photographs.
Preparations (Location- Your home)
- You’ll first need to fill an online form for licence. It’s a PDF form, that generates an application number. It only works in Windows with IE and Adobe reader. Mac wont work, Ubuntu wont work, http://browserstack.com wont work. I used a VM created in Parallels (on Mac) to create the following cheapest possible environment (in terms of memory and labour required) that works –
- 1) Windows XP service Pack 3,
- 2) Internet Explorer 7.0.5730.13
- 3) Adobe Reader 9.4.0 (Old Version of Adobe Reader 9.4.0 Download – OldApps.com – 26.35 Mbs).
- Open IE and visit http://www.rto.kar.nic.in . Click on “License e-Services”. Hopefully you’ll be taken to https://sarathi.nic.in:8443/nrportal/sarathi/HomePage.jsp (if they don’t change the port number, etc). Accept any security confirmation if prompted.
- Click on “Issue of a Learning Licence to me” which should take to https://sarathi.nic.in:8443/UF/pdfforms/NewLicence.pdf . Enable Adobe’s browser plugin to render this PDF on IE. You should get a form like:

- If you have to apply for both 2 wheeler and Car, check (2) “MOTOR CYCLE WITH GEAR (NON TRANSPORT)-(MCWG )” and (4) “LMV-NT-CAR-(LMV )”
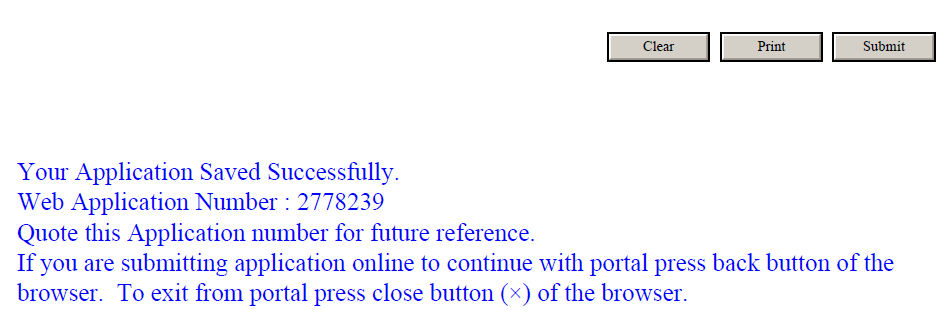
- After filling the complete form, click on “Submit”. You should see this message:

- Note down the application number. Now go back to homepage and click “Print Application Form” https://sarathi.nic.in:8443/nrportal/sarathi/form2.jsp. Fill details, save and print the form. Stick your photo.
- Buy a brown paper folder with ribbon (compulsory). Collate the application form as printed in step 9, Age Proof, Permanent address proof and Local address proof (if applicable). Tie all papers with the ribbon, and write your name, application number and date of birth on top of the folder.
- Exam preparations. You’ll be asked 5-10 random questions on traffic signs (maybe oral or written). Prepare these 3 sections:
- Mandatory Signs – http://www.rto.kar.nic.in/signs/MANDATORY/mandatory.html
- Cautionary Signs – http://www.rto.kar.nic.in/signs/CAUTIONARY/cautionary.html
- Informatory Signs – http://www.rto.kar.nic.in/signs/INFORMATORY/informatory.html
- Do prepare them well. You will be rejected if you dont pass the oral exam. (I was rejected, then I had to re-appear the next day.)
- We are now set to visit KR Puram RTO.
In-Person Visit (Location- KR Puram RTO, Time 9:30am)
- Try to visit RTO before 10am. You’ll finish the entire procedure in less than 20 mins.
- Visit the Challan counter (counter “3”, if they didn’t change it), submit your brown folder, with application number. You need to pay Rs 30 for each vehicle type. For Car + Bike pay only 60/- (Carry change. They refused to accept my 100 rupee note.) Tie the challan on top of other pages.
- Visit 1st floor. The signing officer will tally your originals with Xeroxes and approve the documents if found in order.
- Visit room number 2, for the Oral/written exam. The RTO inspector will ask you to explain 5-10 random signs. If you pass the exam, he’ll approve your file and keep it with himself. You then need to visit after 3 business days and collect your licence.
- If you fail the exam, dont panic. Your folder will be returned back to you and you’ll need to re-appear for exam, the very next day. Before appearing for exam, you’ll need to re-visit the signing officer (step 3). He’ll stamp your file with new date. Then you can proceed for your exam.
- Total cost- Rs 60/-
- Total RTO Visits required- 2
- Time Invested- 4-5 hours (including form filling and visits)
I have not completed 1 month yet, so haven’t appeared for Permanent licence. Will update the answer once I do so.